Mold & mildew treated to ensure proper adhesion of sealer.
The Process

Our 20 Step Process is a Complete Way to Protect Your Driveway for Years Saving Your Money!
Some Driveways Require Advanced Preparations

MOLD & MILDEW PRE-TREATED
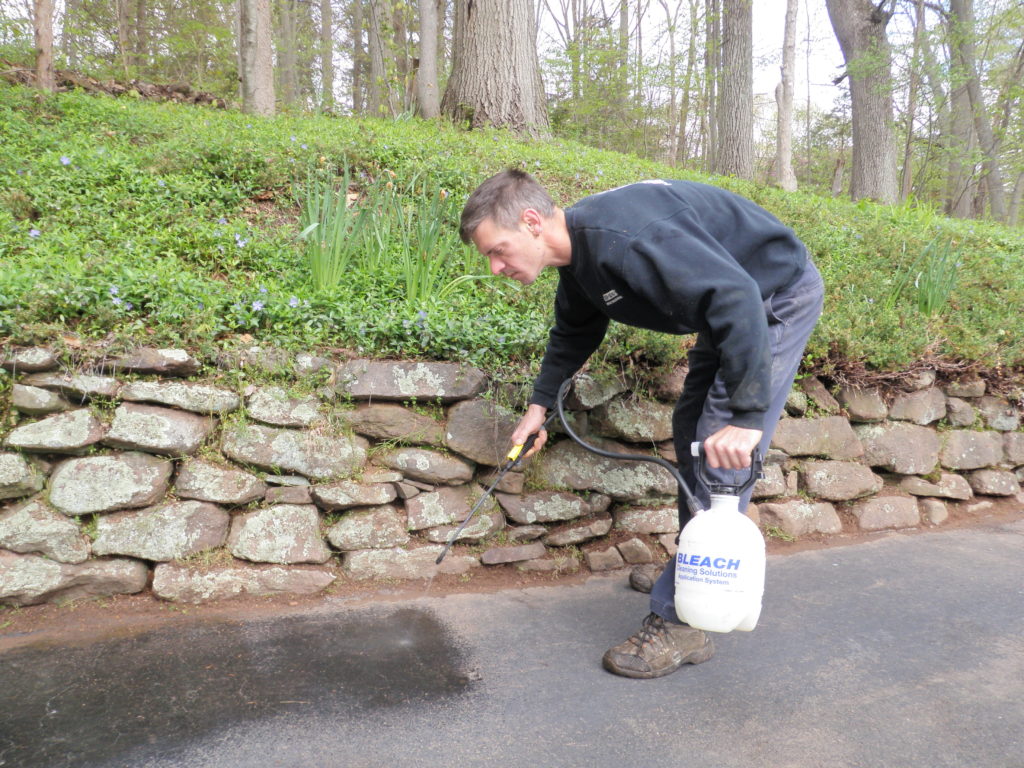

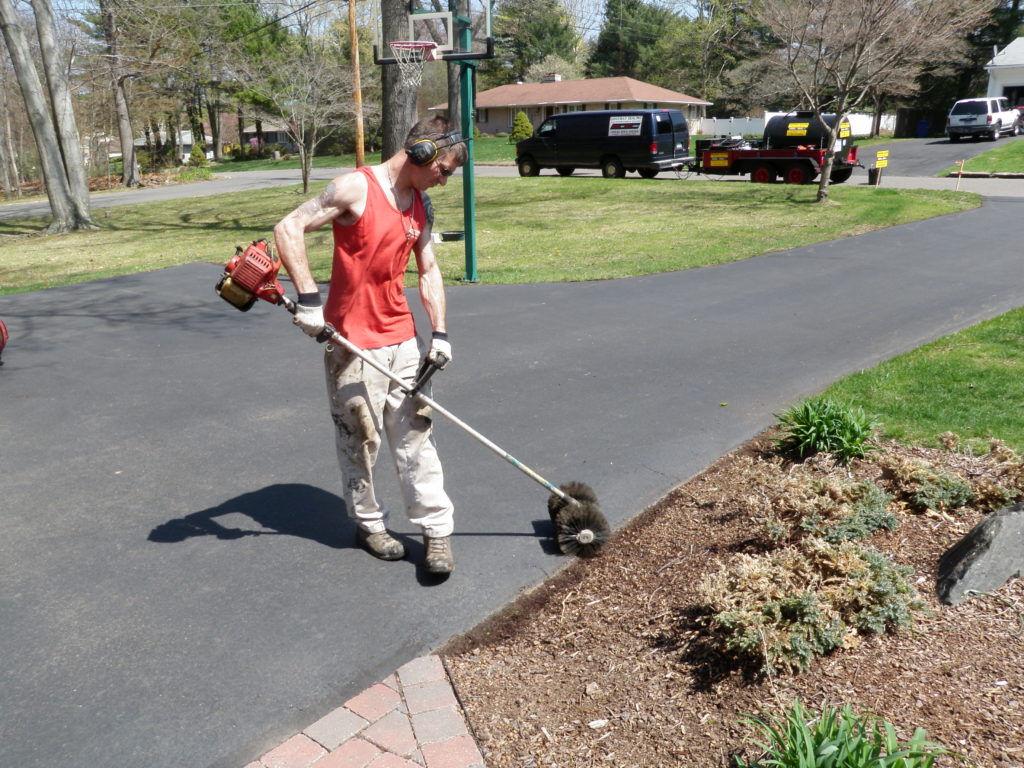
VEGETATION
Vegetation treated to help prevent regrowth.


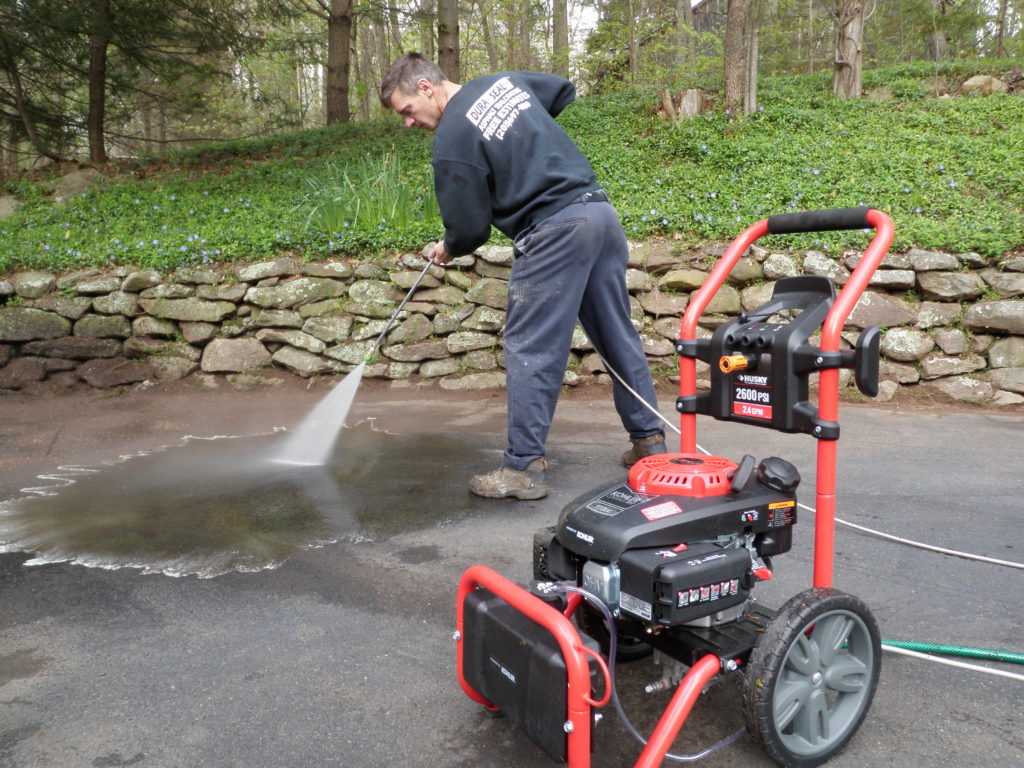
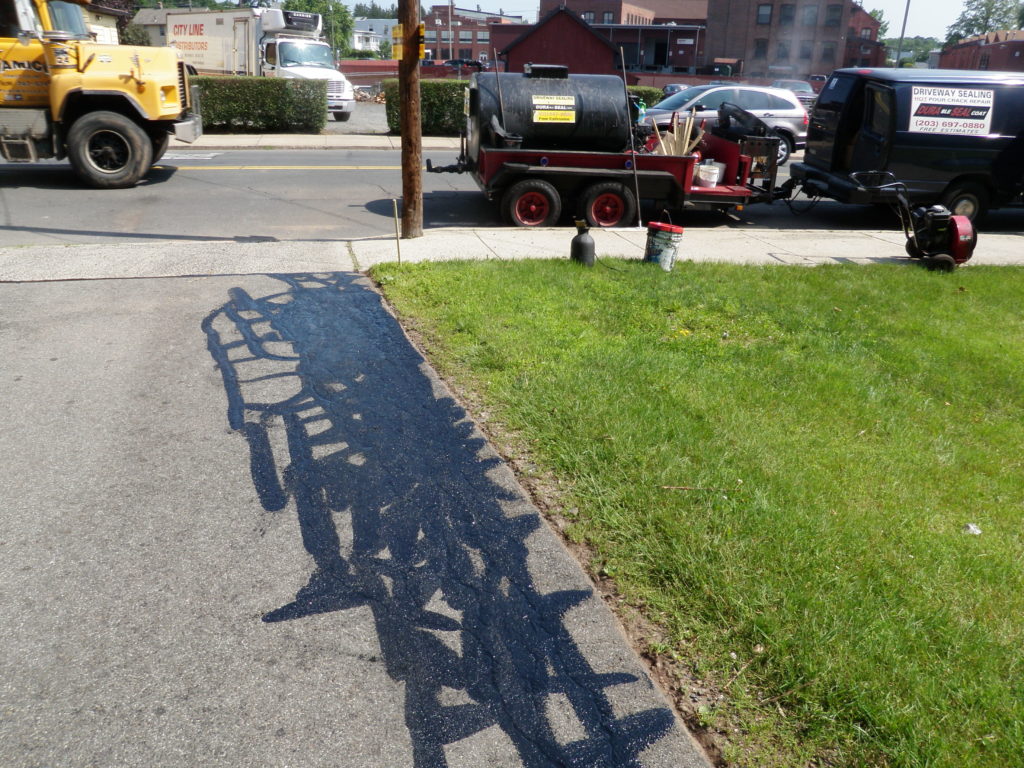
POWER WASHING
Powerwashing is used if heavy mildew, dirt or tree sap is present to ensure proper adhesion of sealer.

POTHOLES
Potholes cleaned properly compacted with asphalt using high pressure hammer tamps. We don’t simply hand tamp.
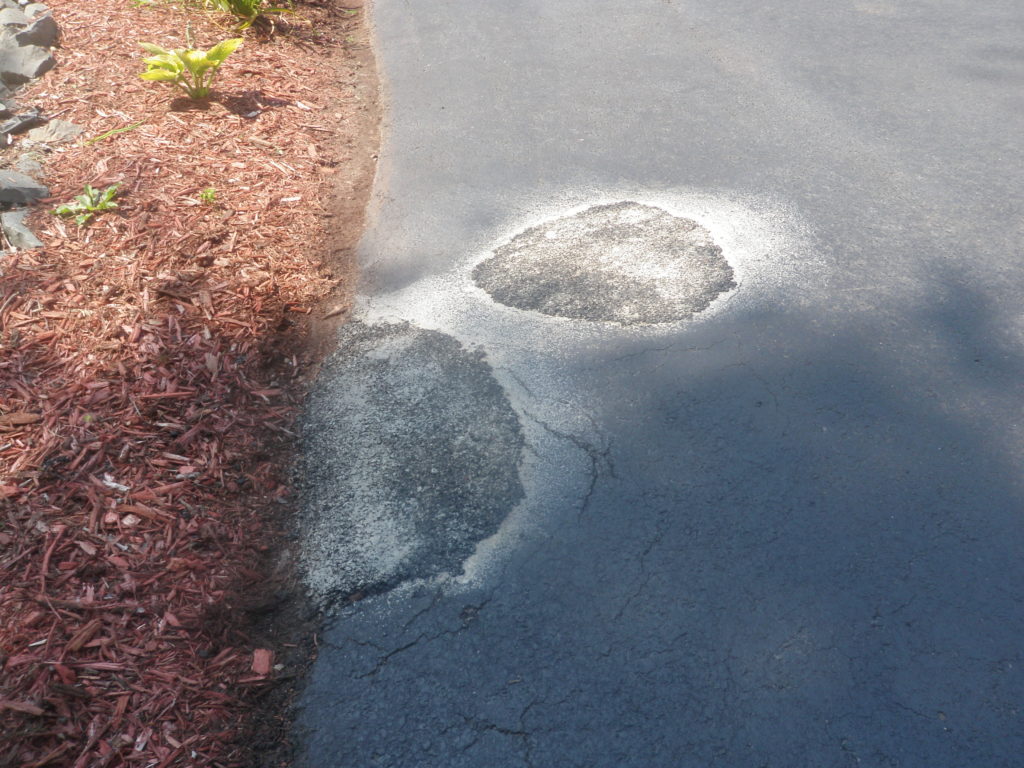


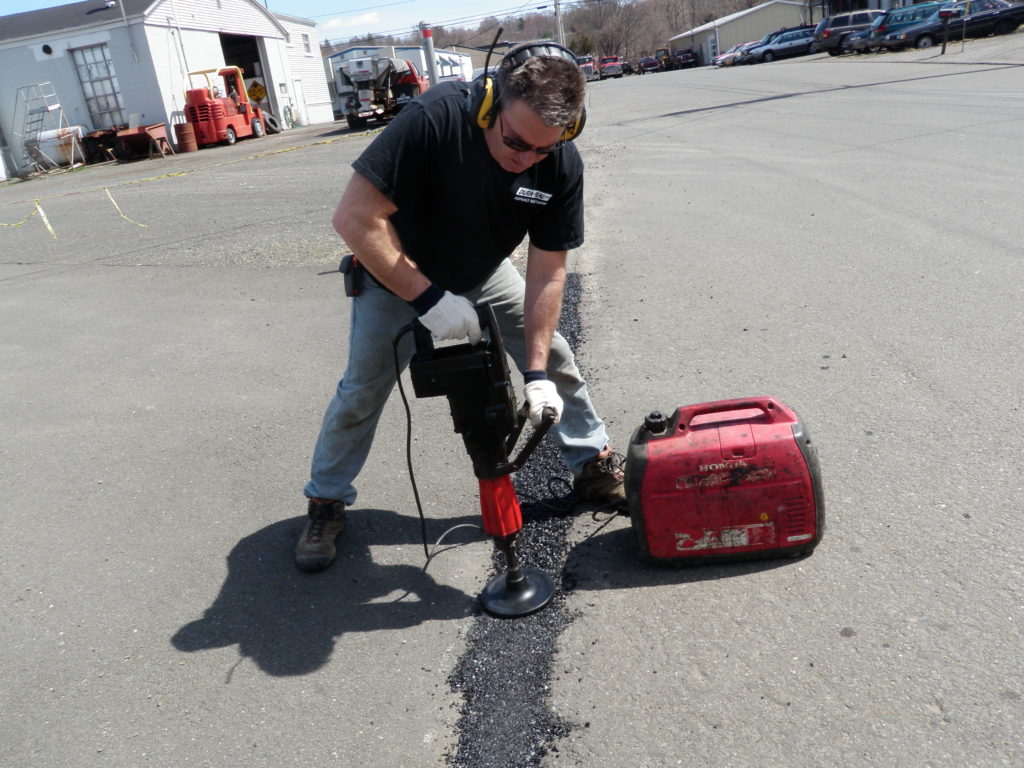
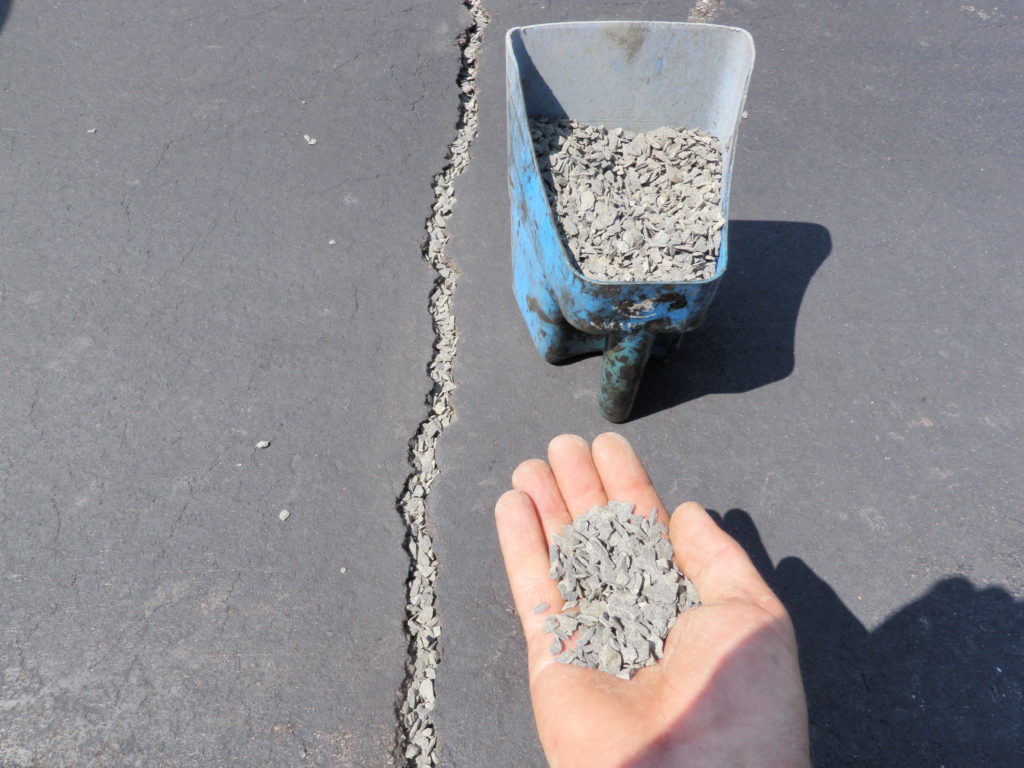
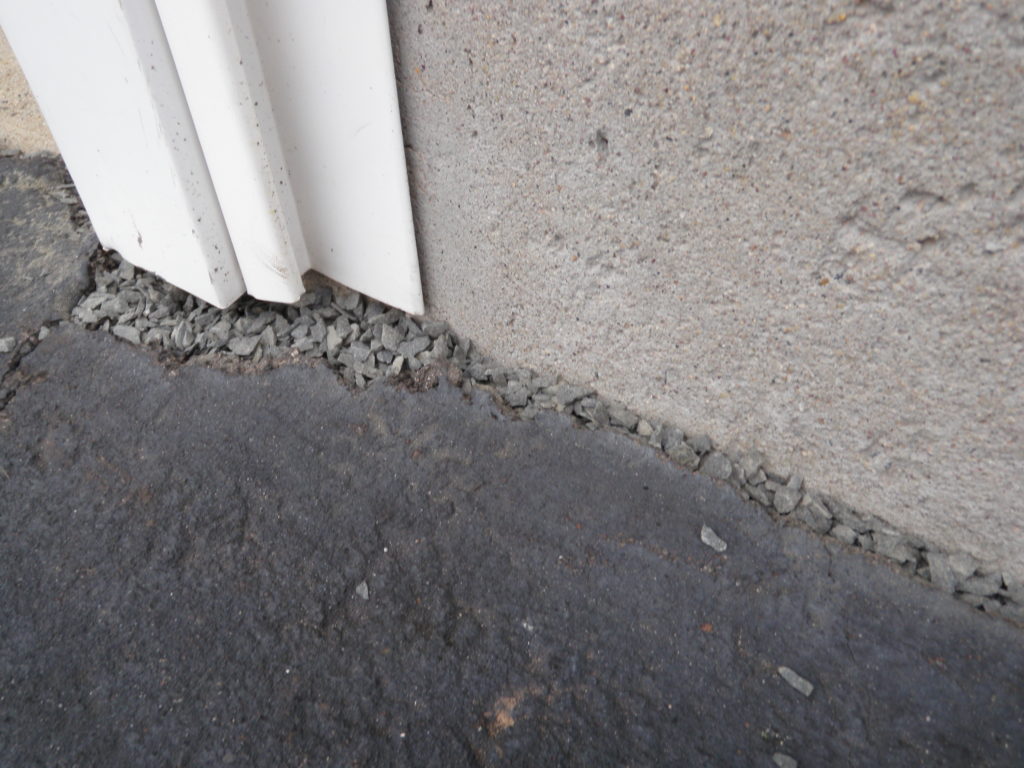
WIDE CRACKS
Wide cracks cleaned properly compacted with asphalt using high pressure hammer tamps. We don’t simply hand tamp.
On Your Scheduled Day of Completion: Driveway Prepared

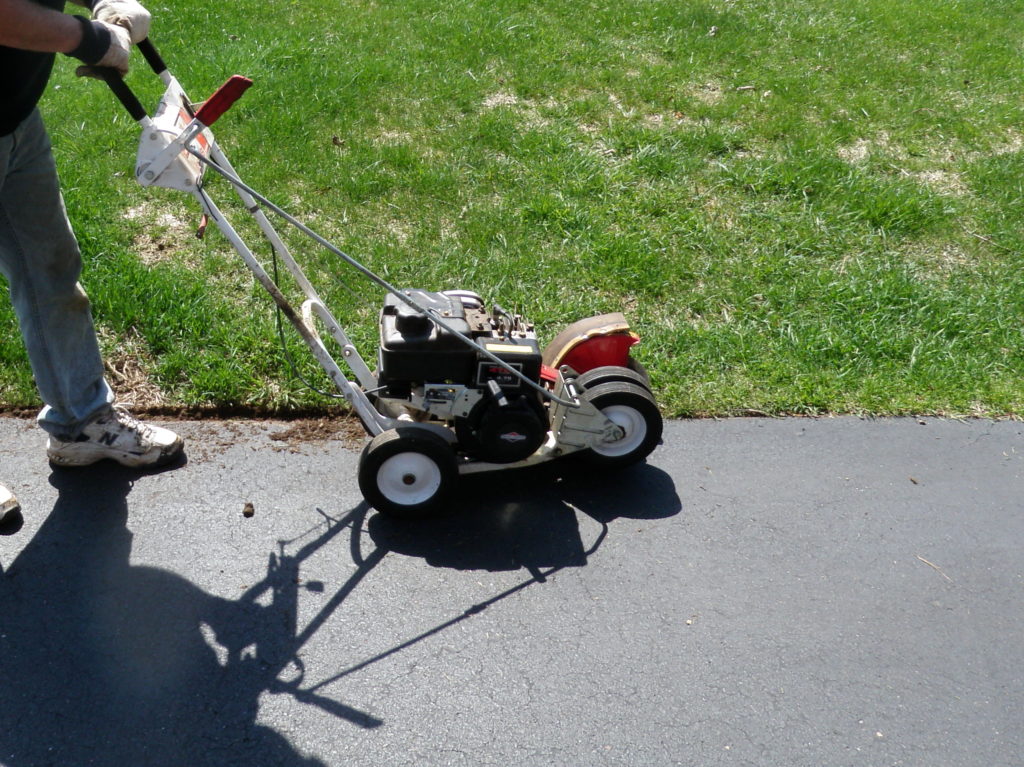
FREE GRASS EDGING AND FOLIAGE CLEARED
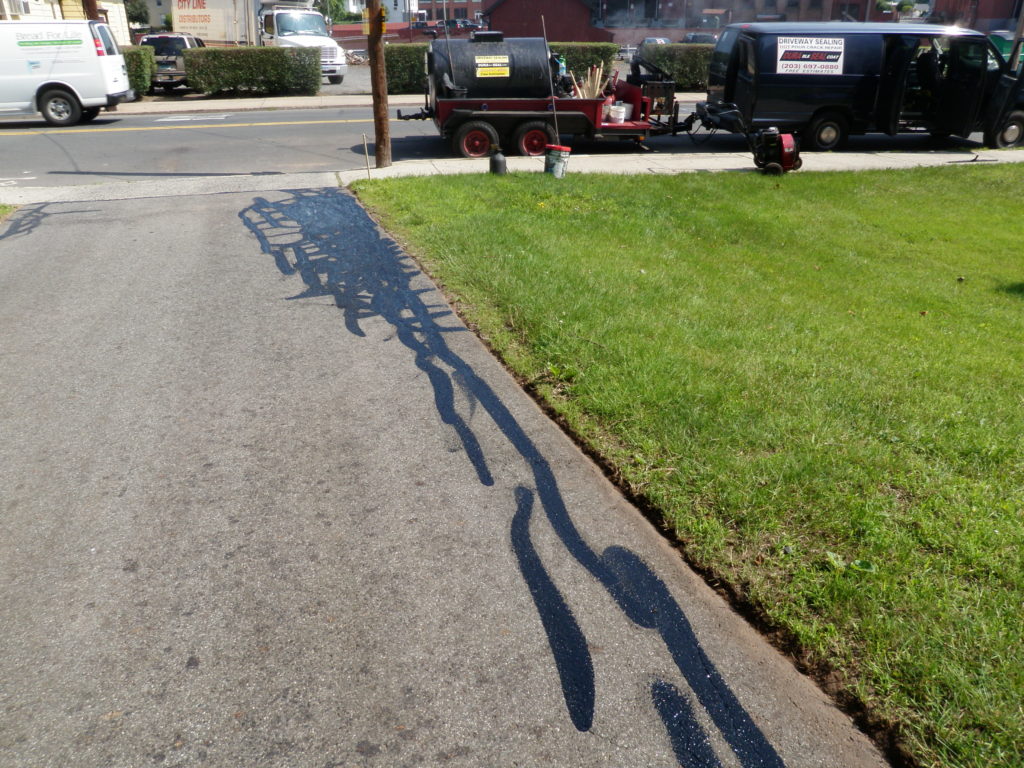
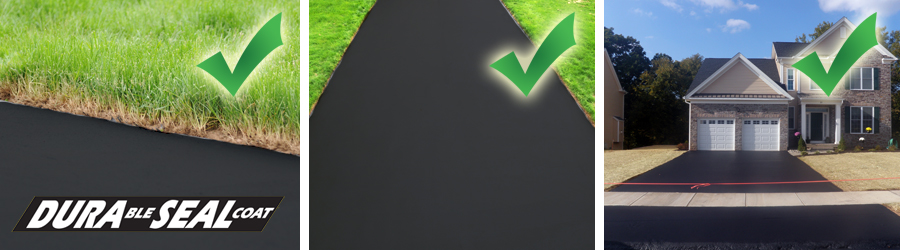
Free grass edging of pavement. Our twist knot wire edging wheels ensure neatness, a straight edge, and helps prevent root damage while not damaging your driveways edge, sprinkler heads or invisible pet fences. We don’t hastily edge GRASS with a weed wacker.


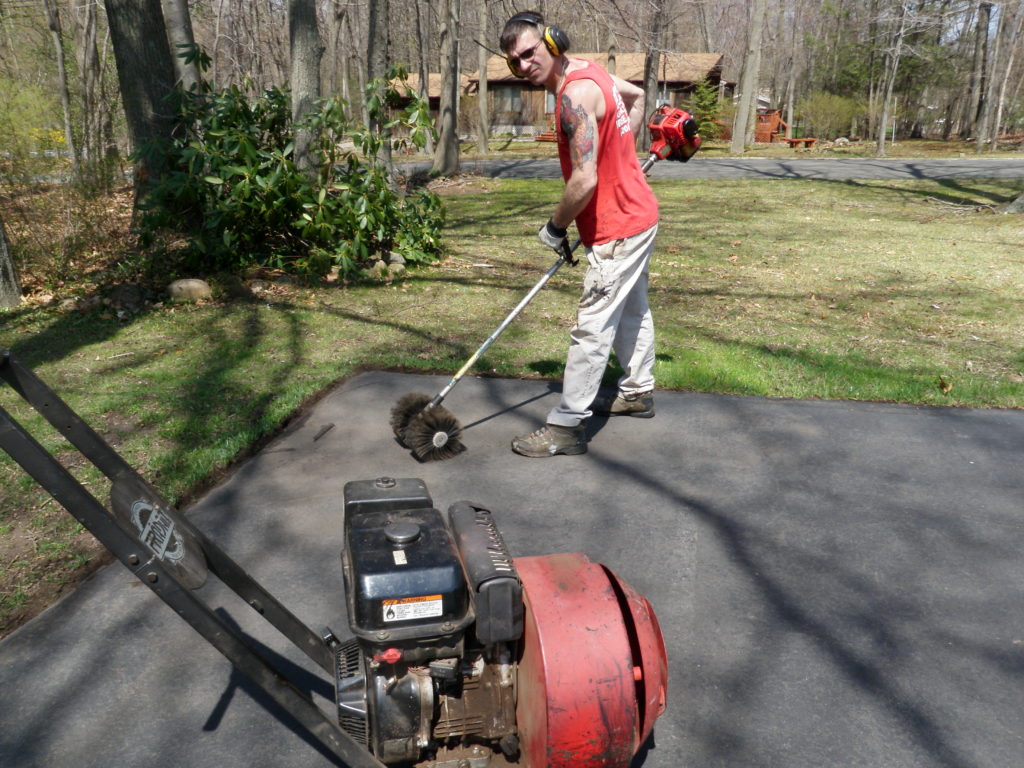
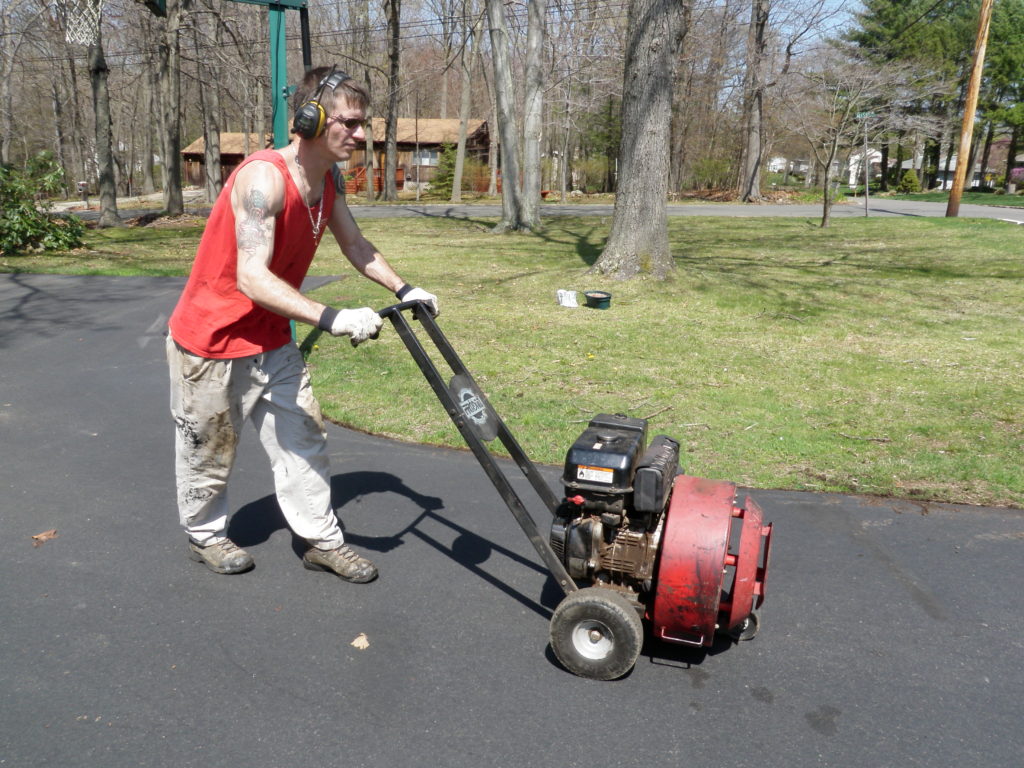
DRIVEWAY CLEANED
Driveway cleaned thoroughly using industrial air blowers and the latest wire bristled power brooms to ensure a seal coat we can WARRANTEE.

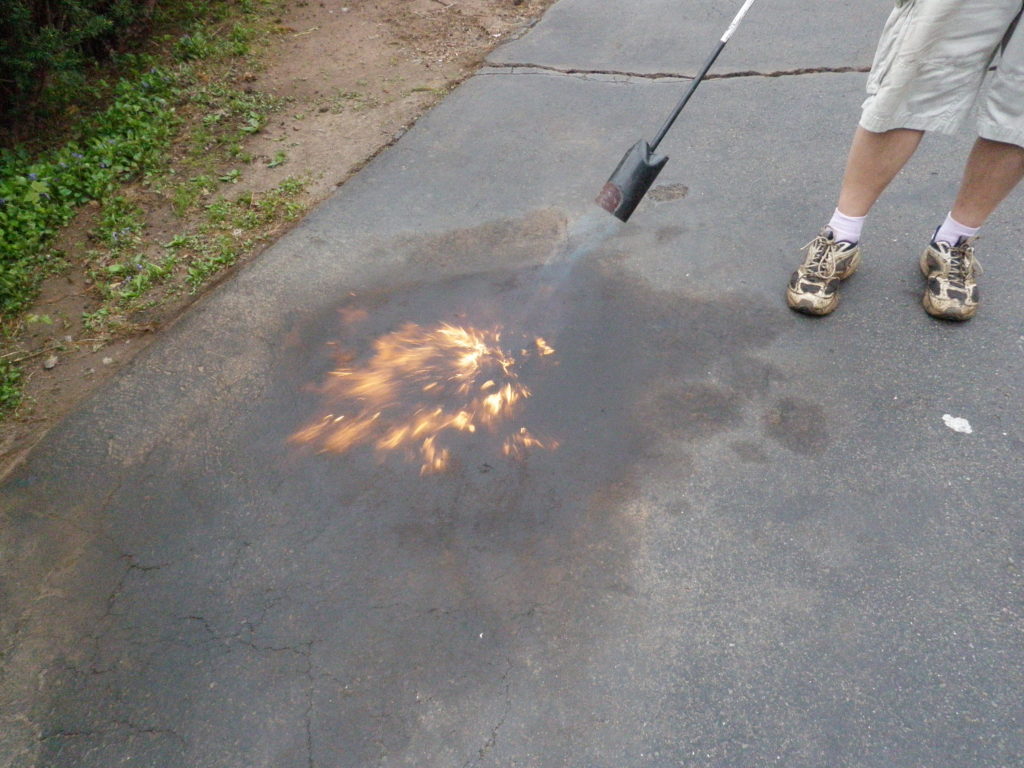
OIL & GAS STAINS
Oil & gas stains flame torched, wire brushed and primed.
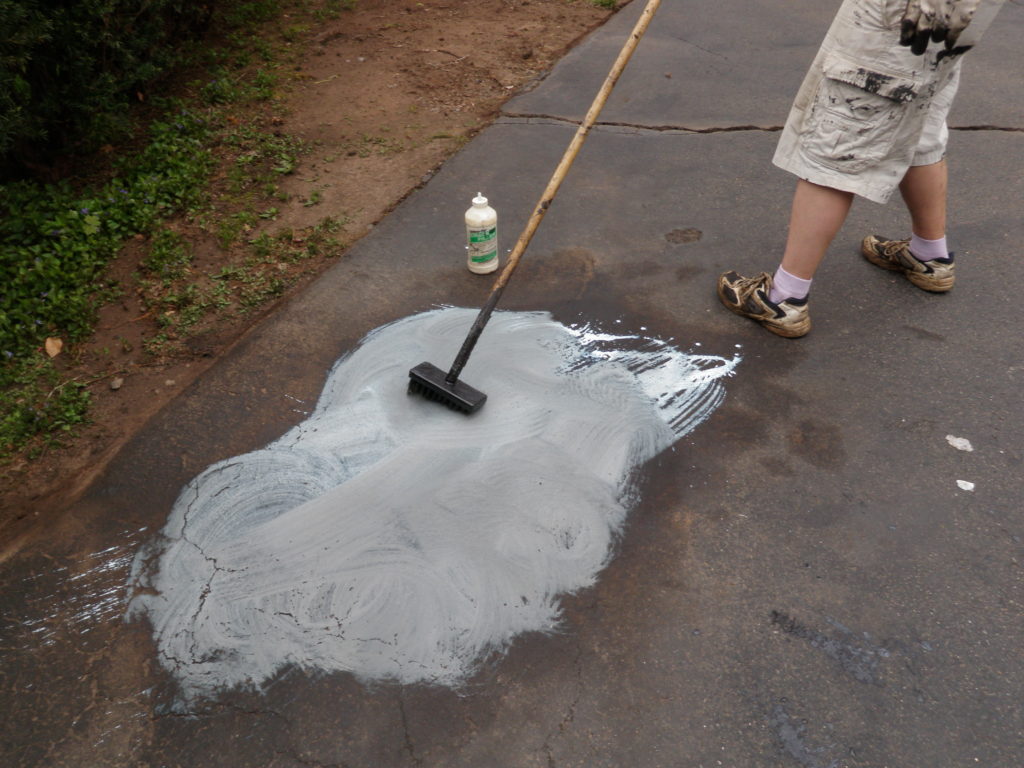

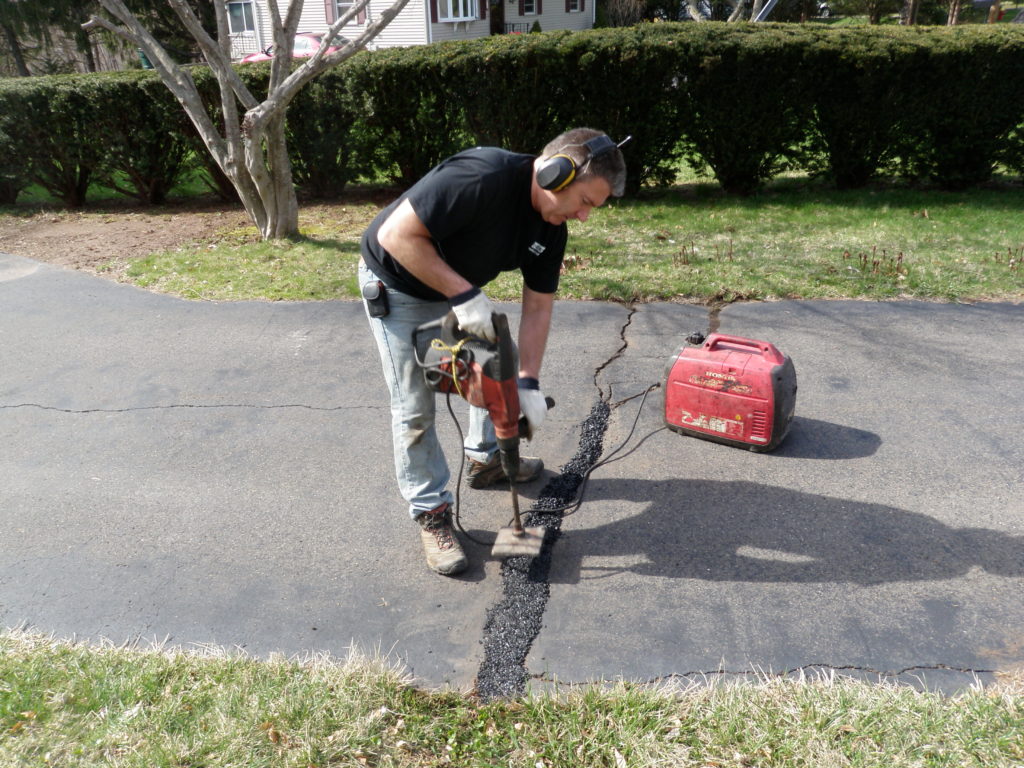
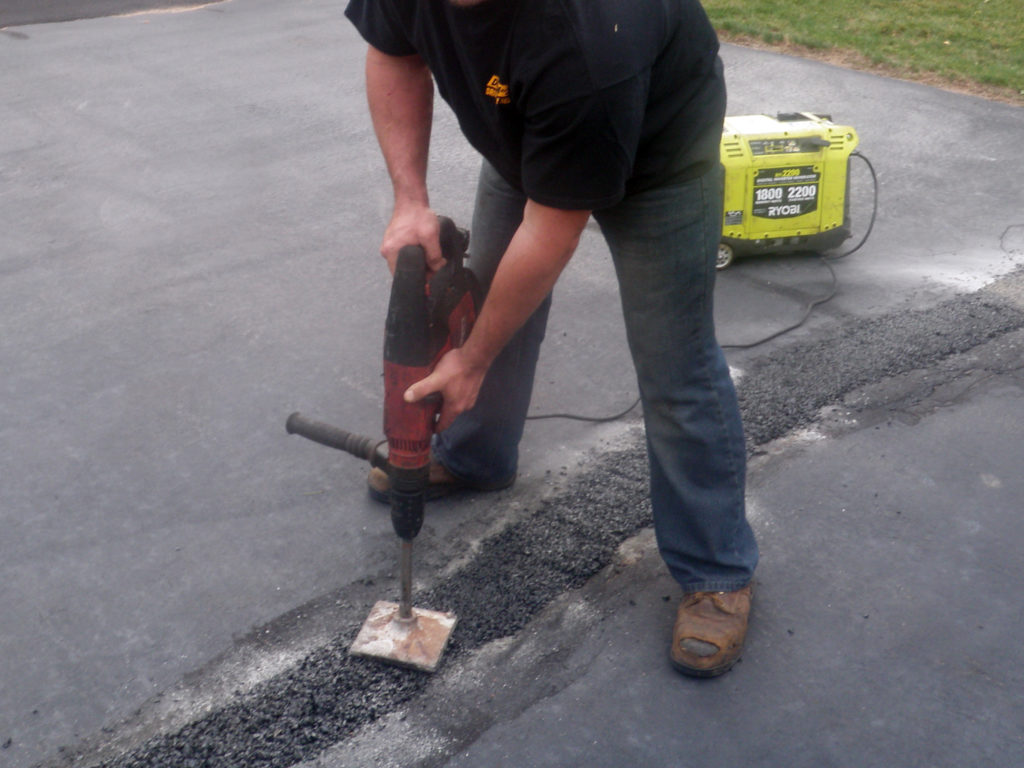
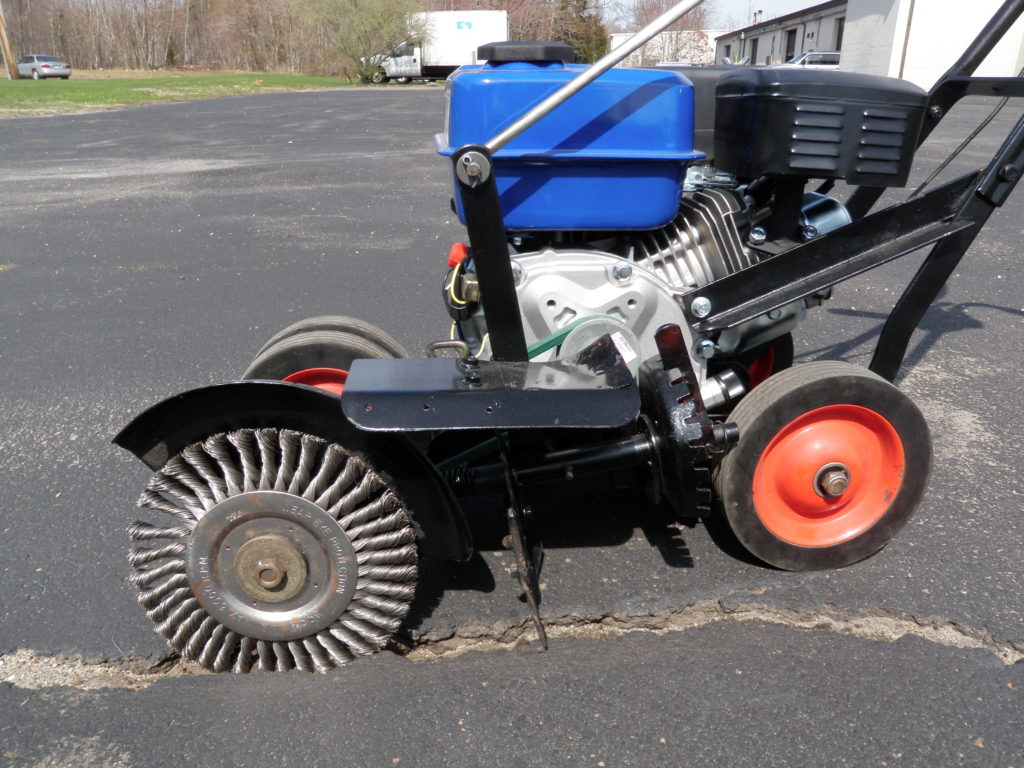
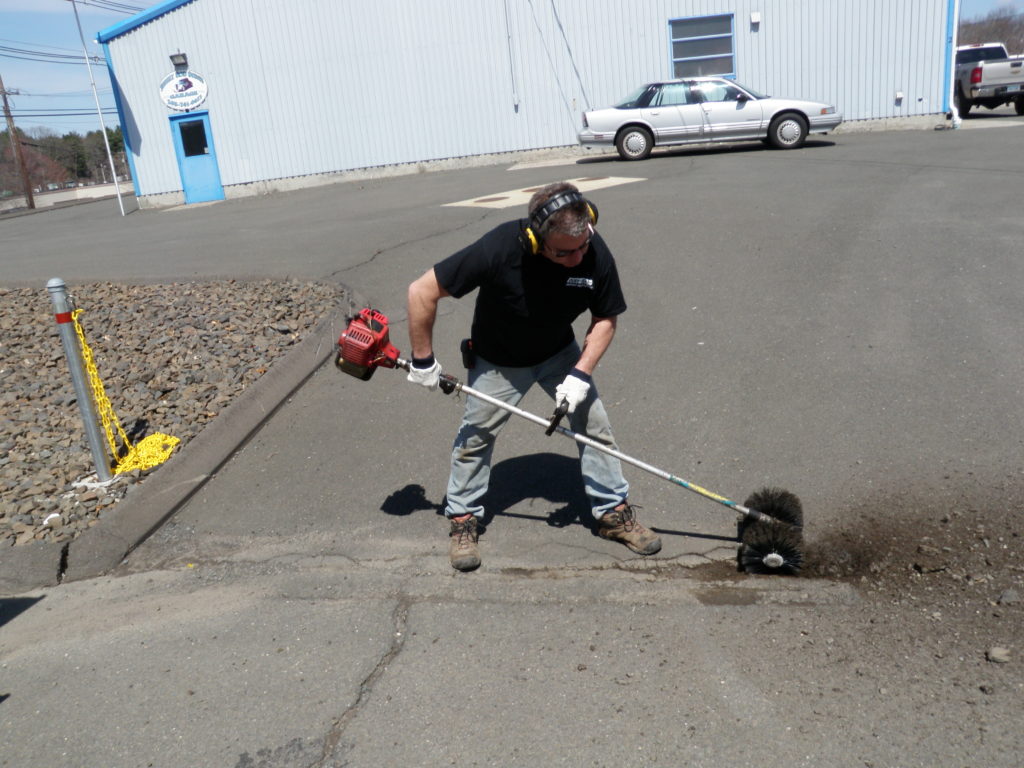
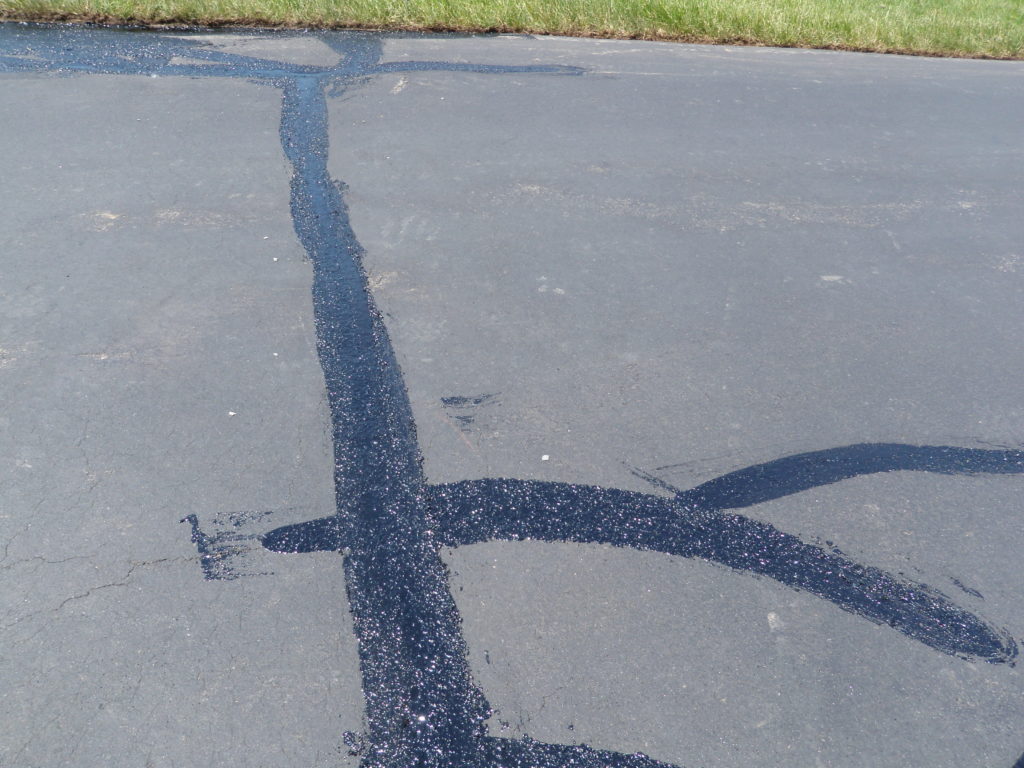
CRACKS CLEANED
We combine routing, blowing, heat lancing and power wire brushing to clean out cracks.

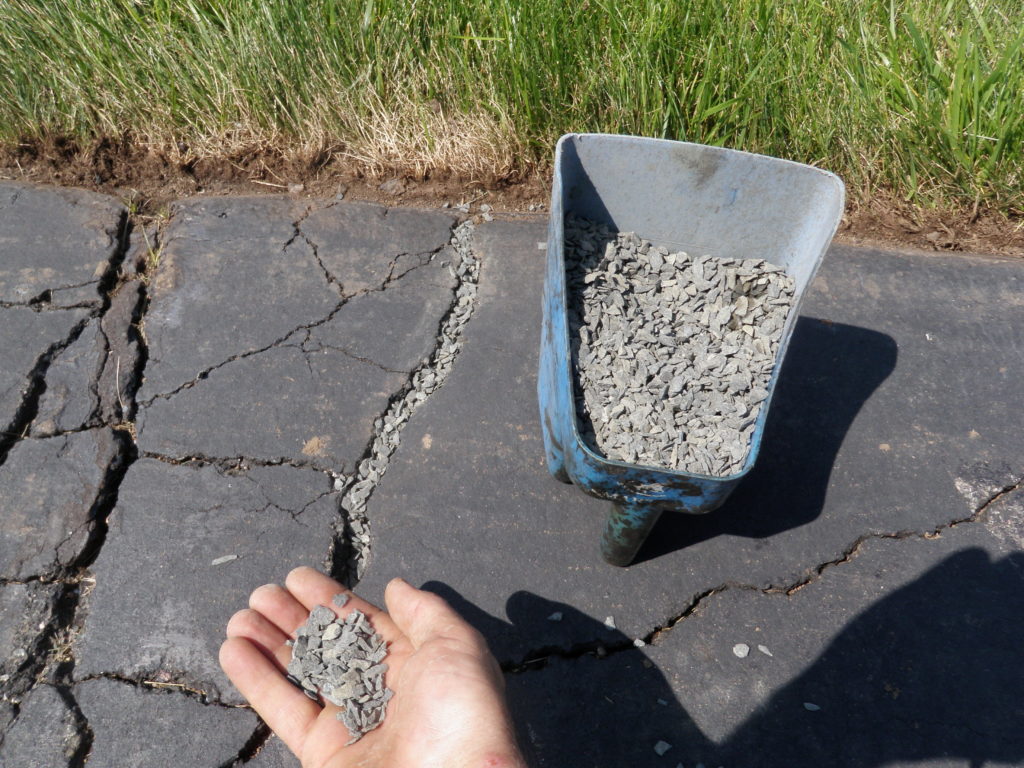
CRACKS PREPARED
Cracks prepared with deep crack prefill to help prevent sinking, greatly increasing the life of the repair.
On Your Scheduled Day of Completion: Driveway Repaired

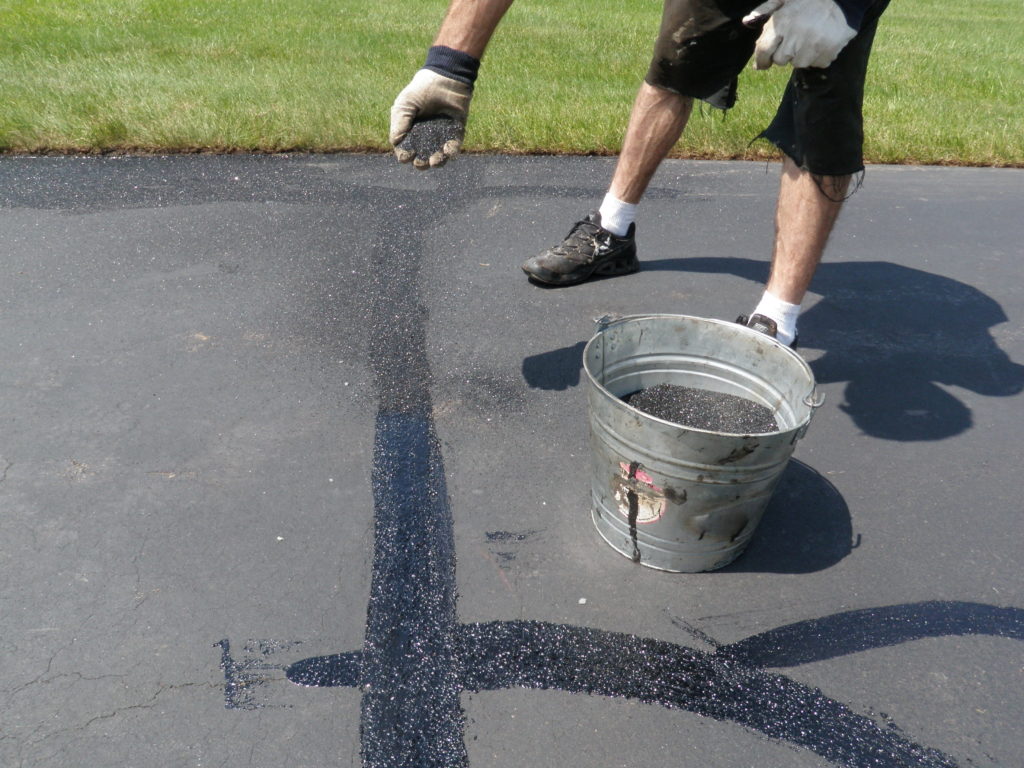
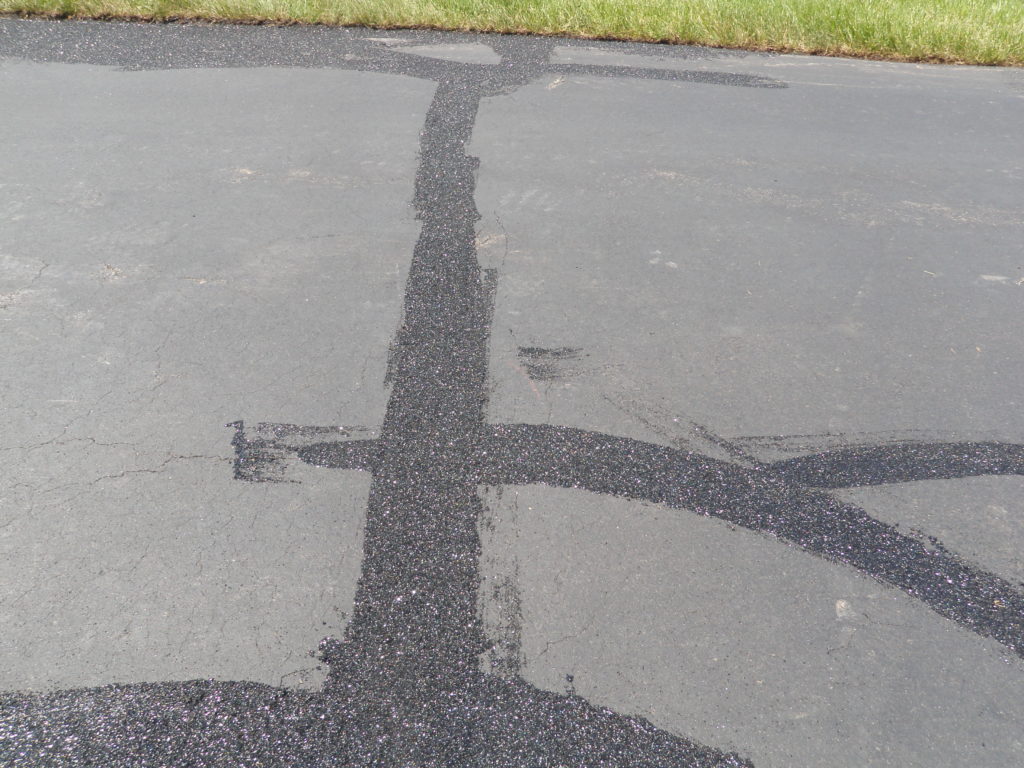
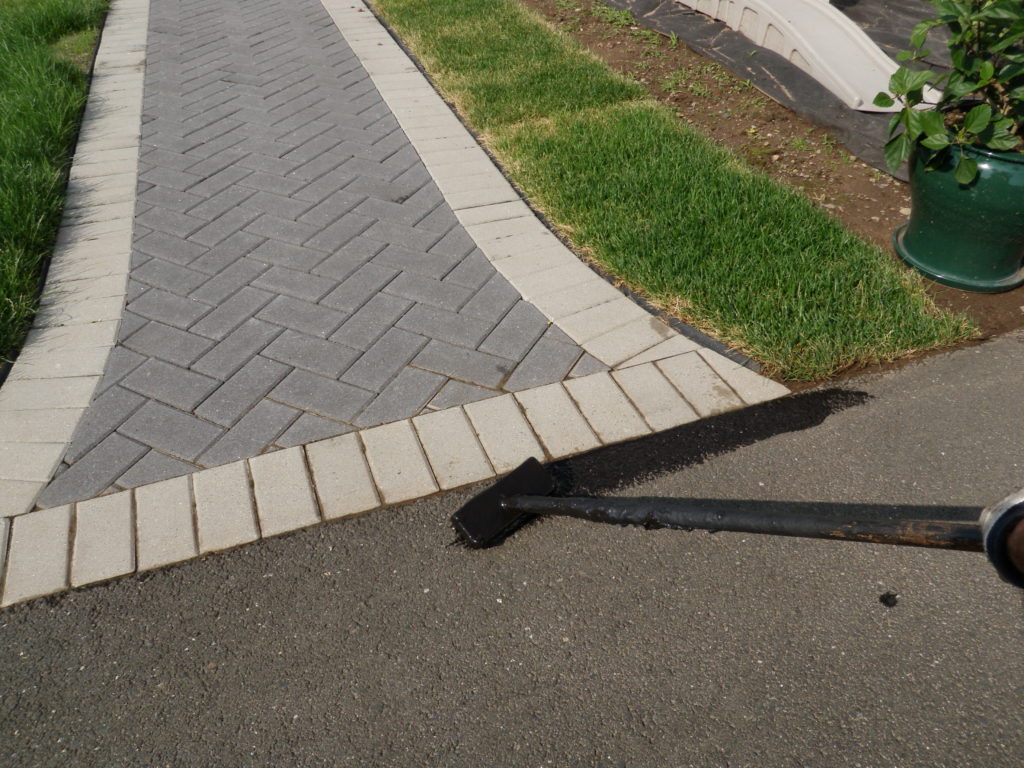
CRACKS REPAIRED WITH 400 DEGREE HOT RUBBERIZED CRACK SEALANT
Cracks repaired with 400 Degree hot rubberized crack sealant applied neatly with a goal of overall longevity, surface consistency and aesthetics in mind. We only use the highest grade federaly approved crack sealants.

BLACK BEAUTY SAND APPLICATION
For better blending and wear, Black Beauty Silica Sand is applied or cracks are double coated with driveway sealer.

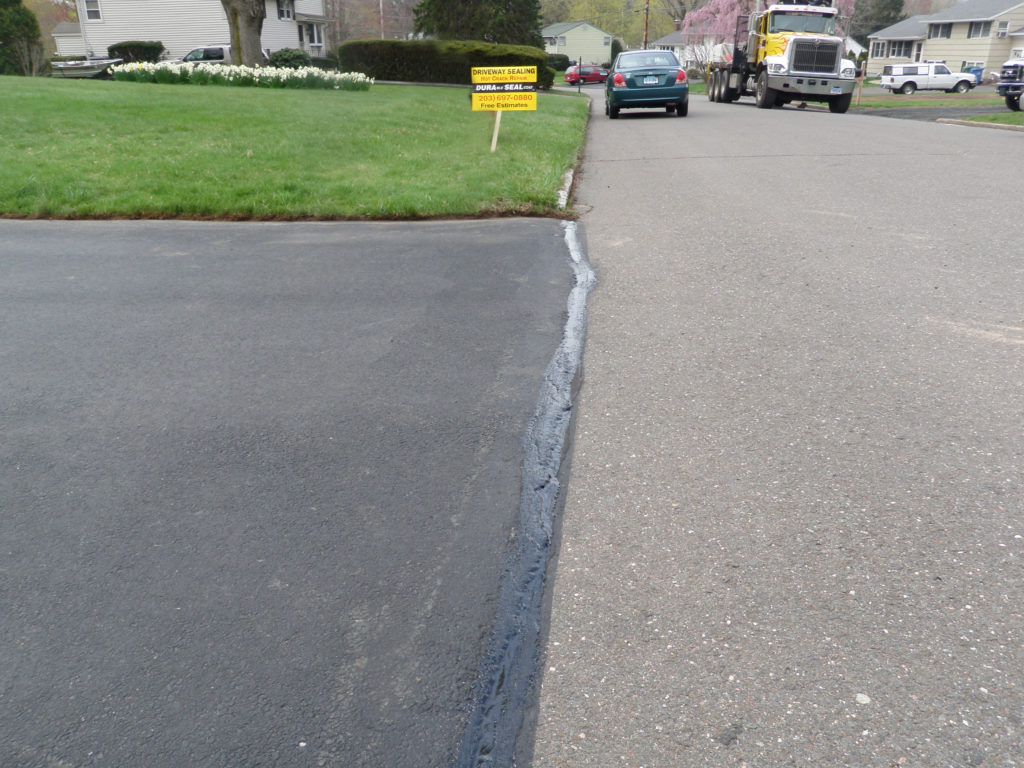
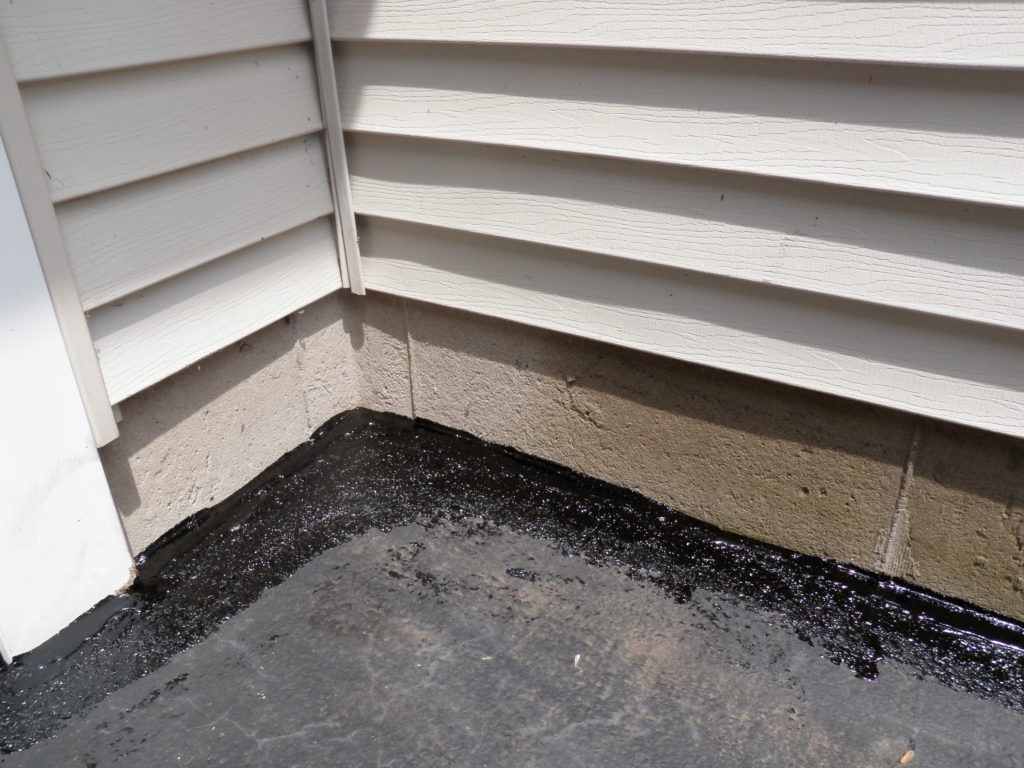
SEAMS/JOINTS 400 DEGREE HOT SEALED (GARAGE DOOR)

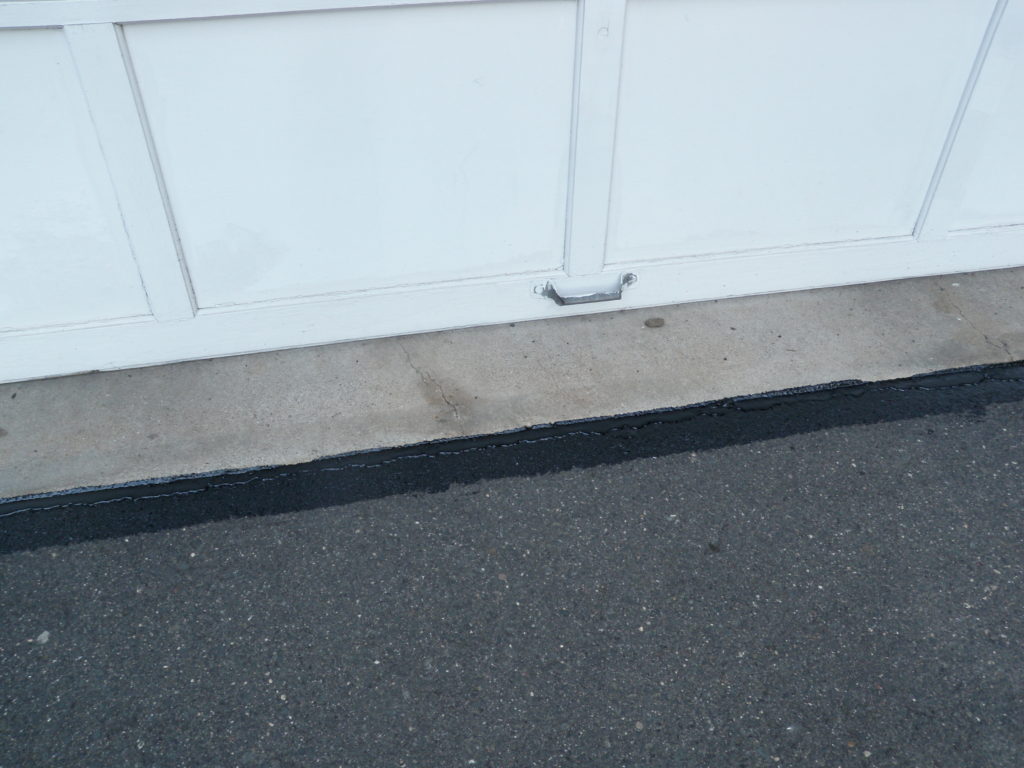

SEAMS/JOINTS 400 DEGREE HOT SEALED (SIDEWALK)
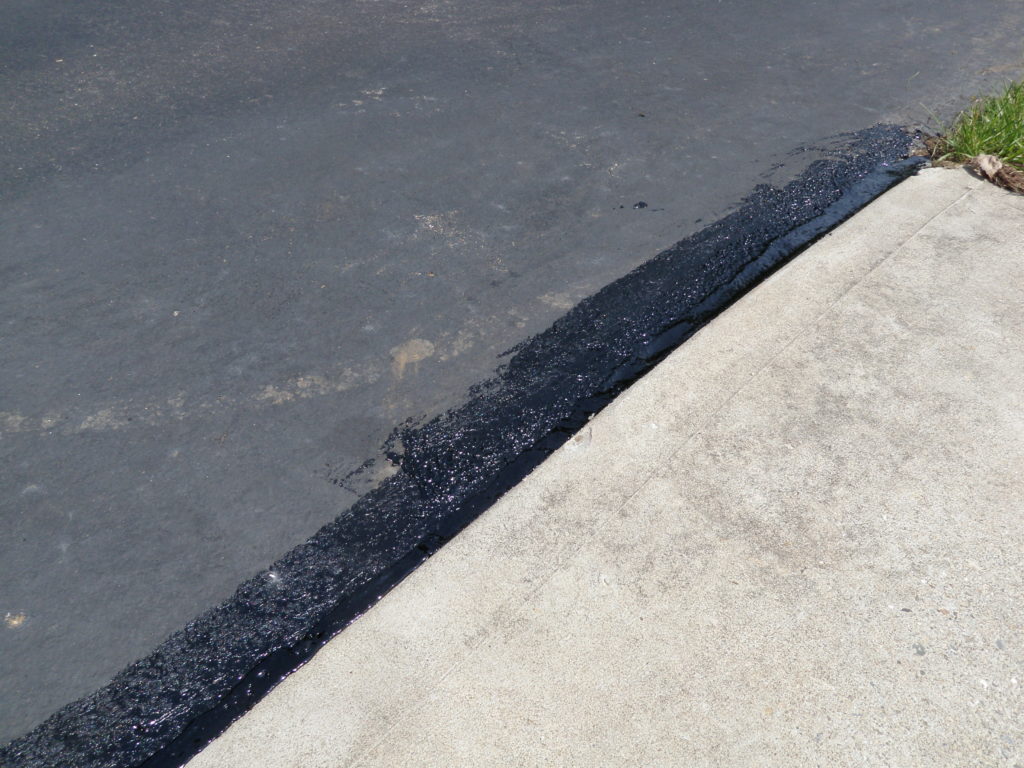
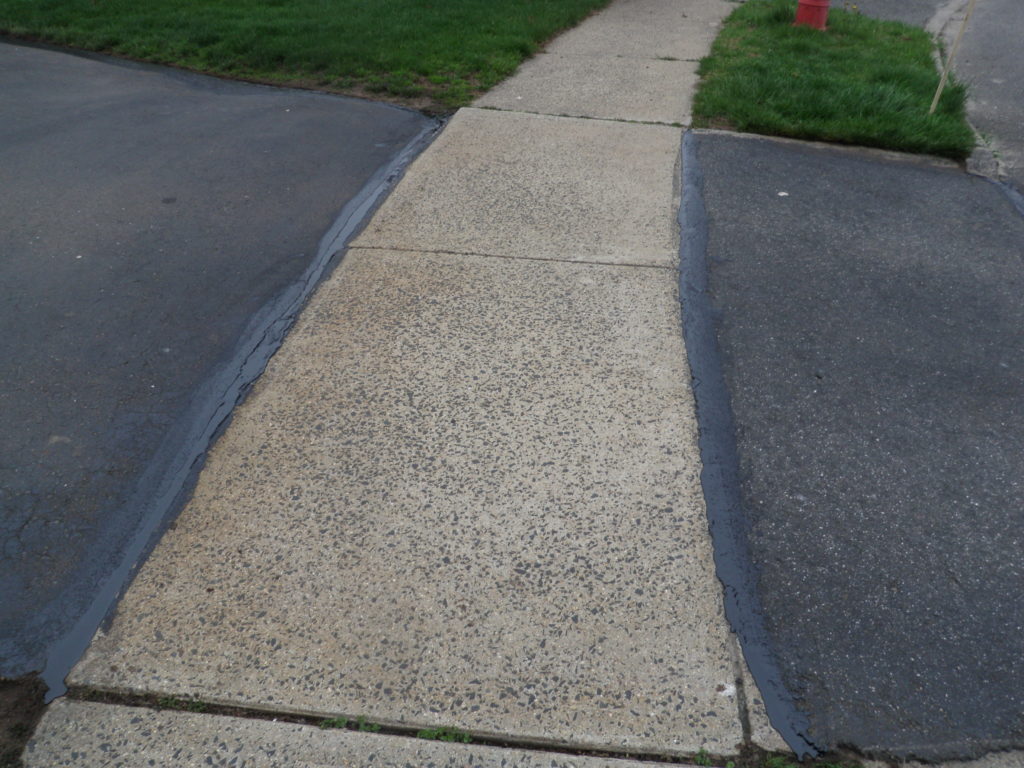

SEAMS/JOINTS 400 DEGREE HOT SEALED (ROAD)

SEAMS/JOINTS 400 DEGREE HOT SEALED (FOUNDATION *UPON REQUEST*)

On Your Scheduled Day of Completion: Pavement Sealed

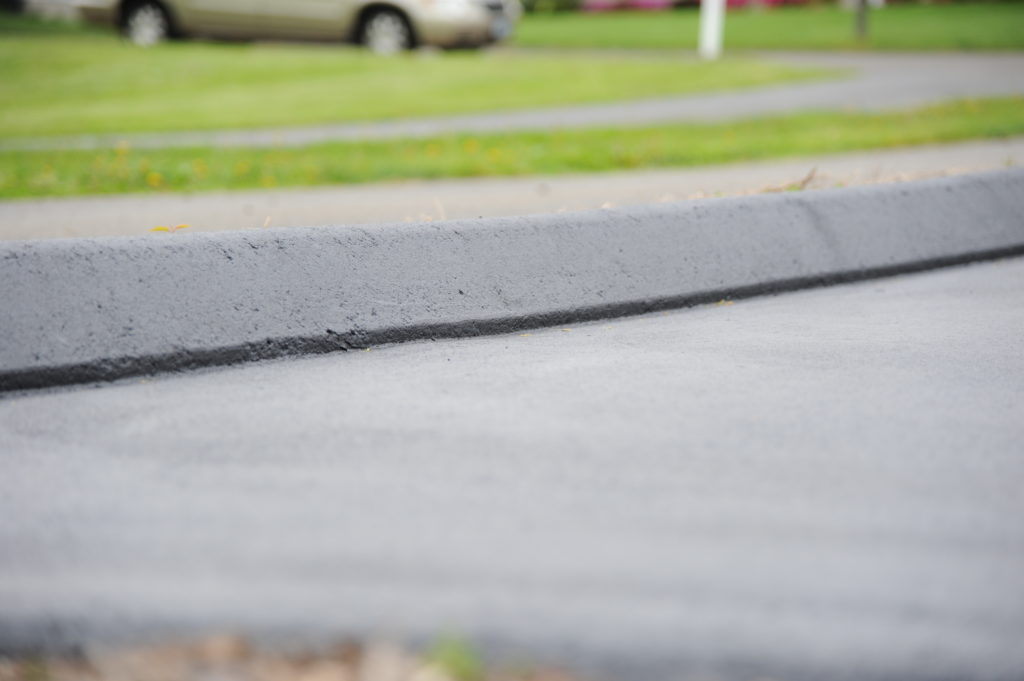
EDGING BRUSHES
We use edging brushes to ENSURE NEATNESS.


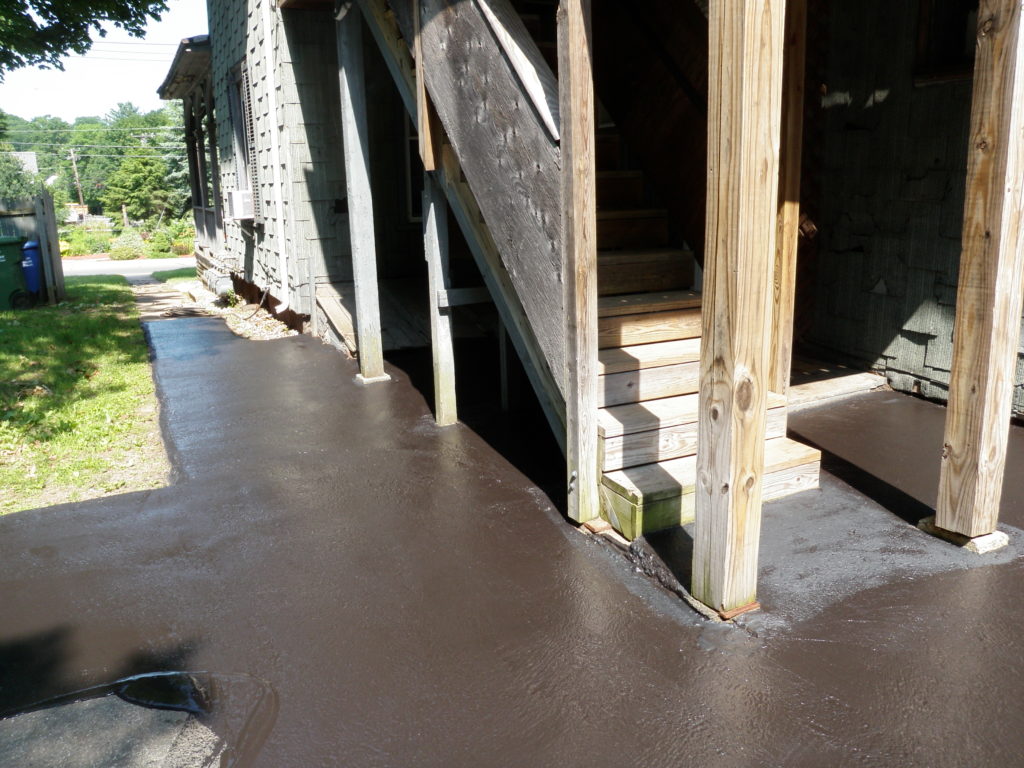
ASPHALT WALKS SEALED
Asphalt walks included unless otherwise specified
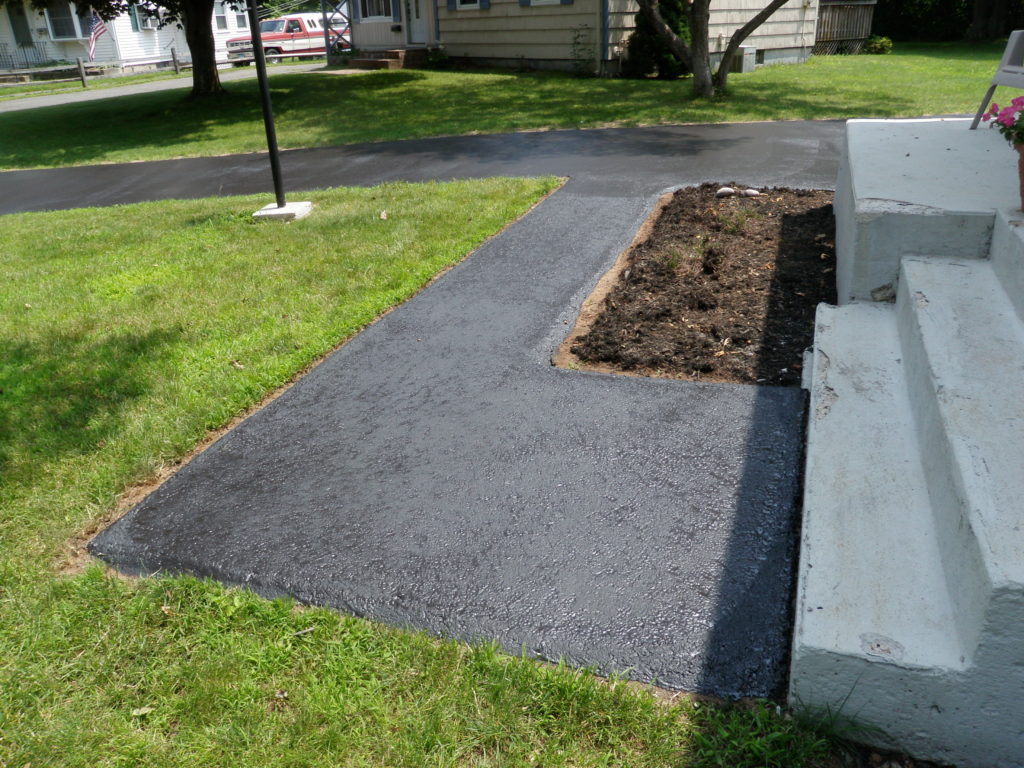

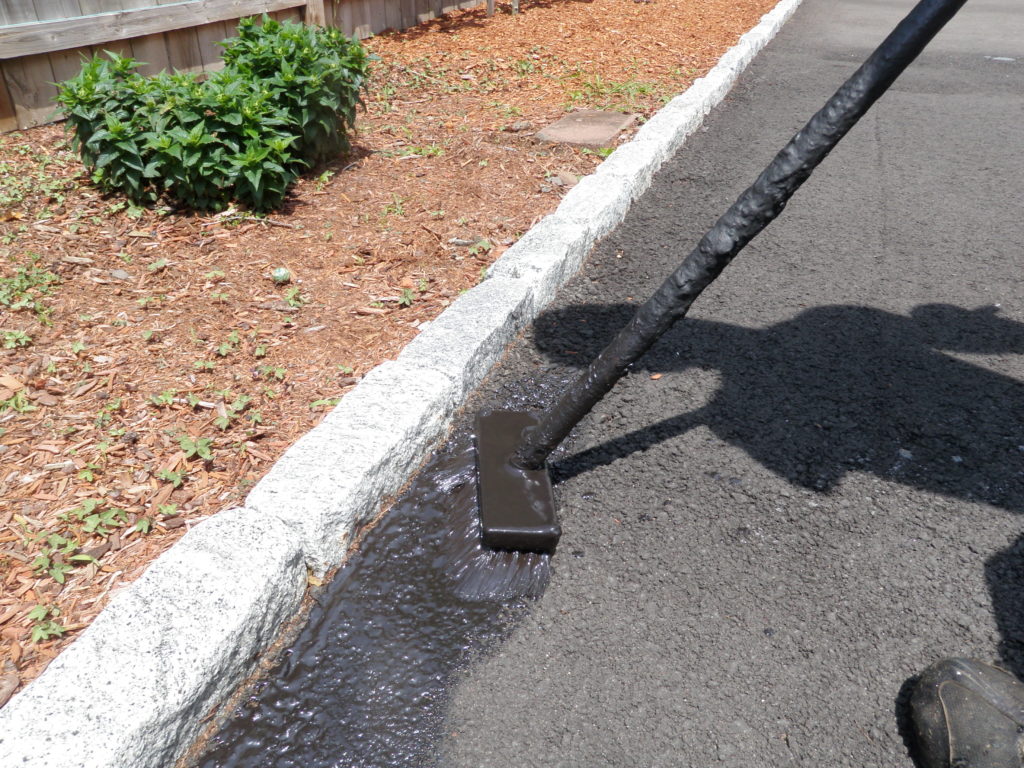
CURBING SEALED
Hand brushed to ENSURE NEATNESS

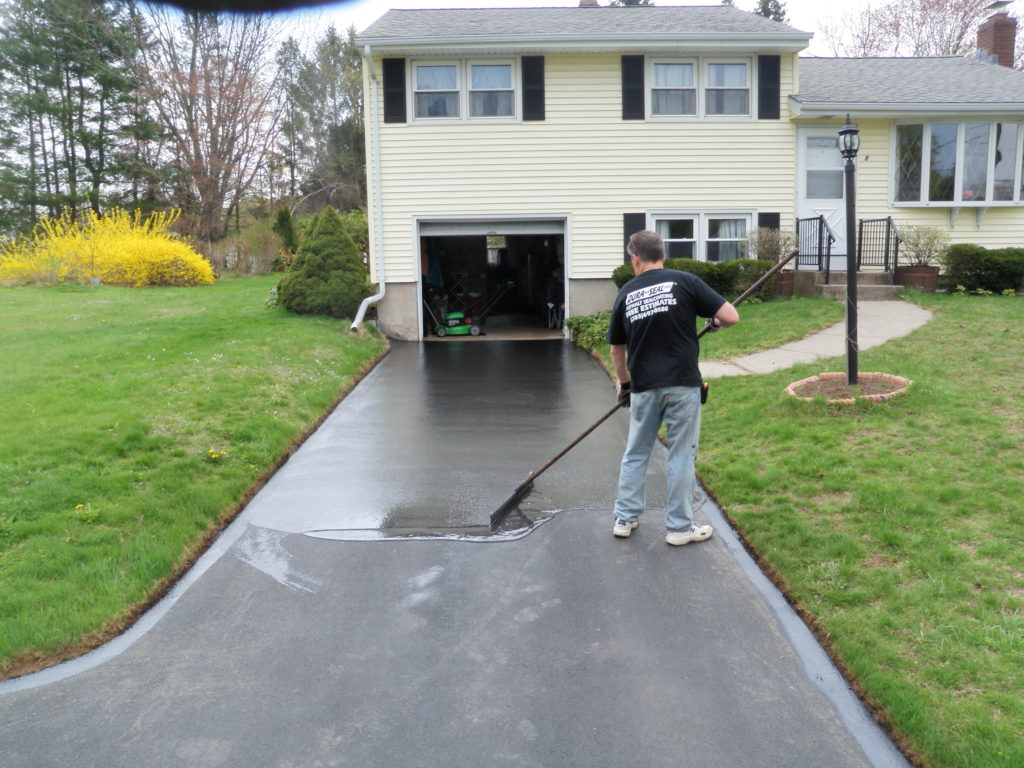
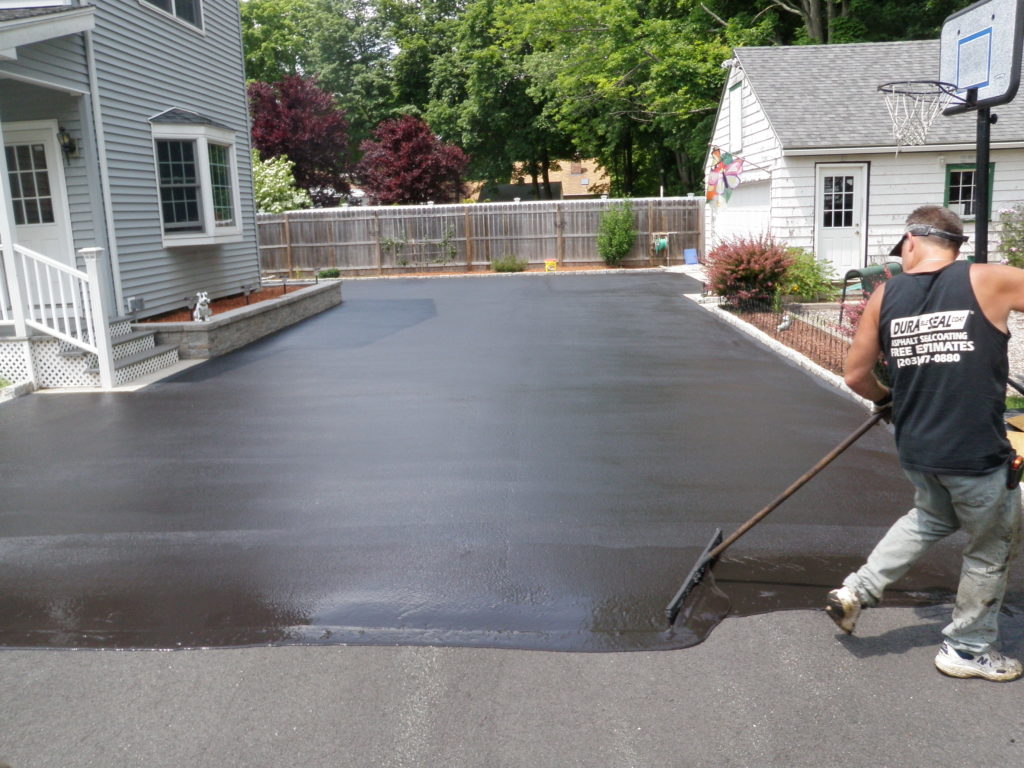
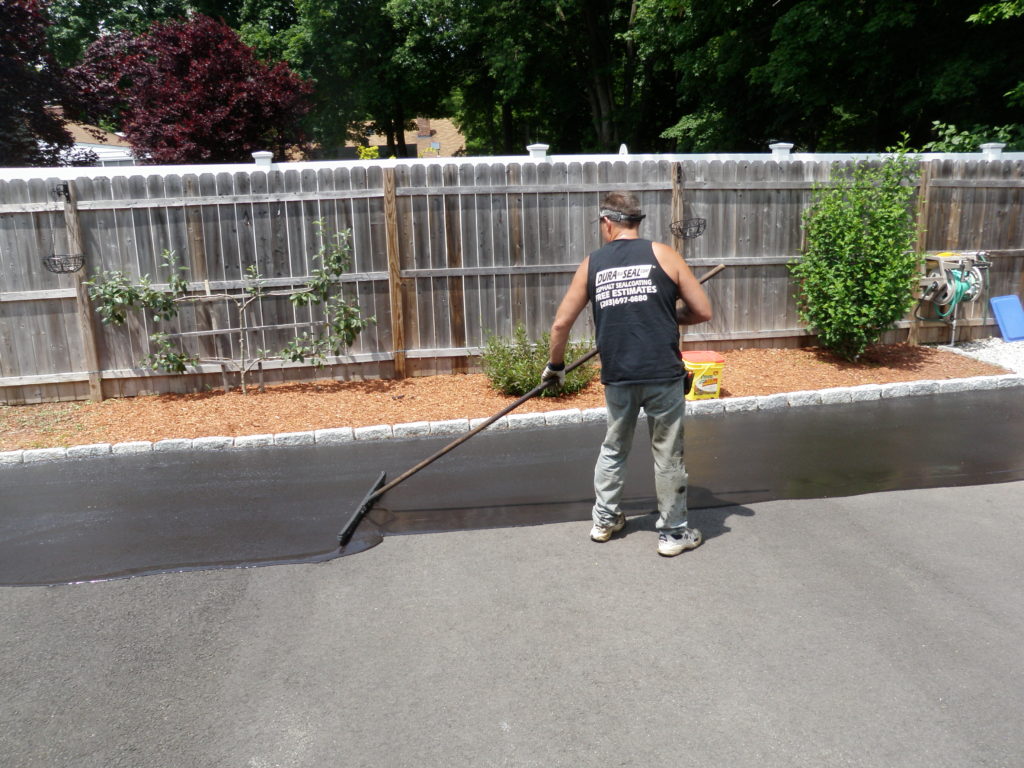
GUM RUBBER SQUEEGEES
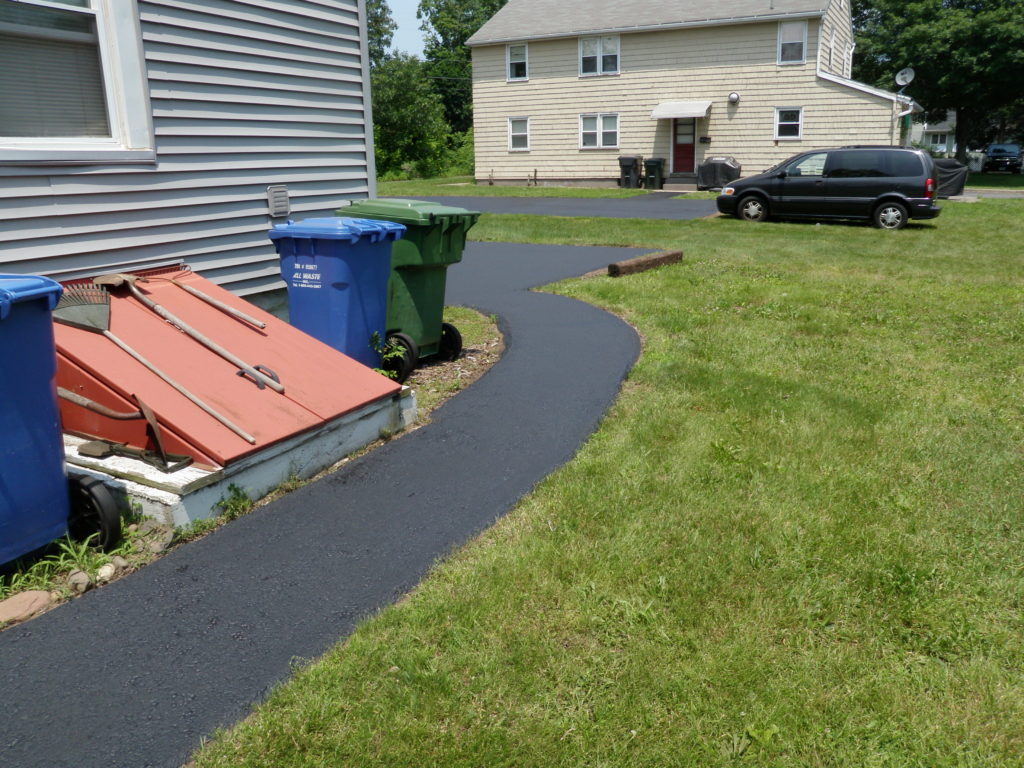
DRIVEWAY SEALED with XL1000 Commercial Grade Sealer by Dalton Coatings. The sealer is applied full strength by hand with professional PRO COATER® GUM RUBBER SQUEEGEES for a liberal streak free coat. Your driveway can be rain safe in just 30 minutes. We use FSA/FASS-DRI sealer enhancer.

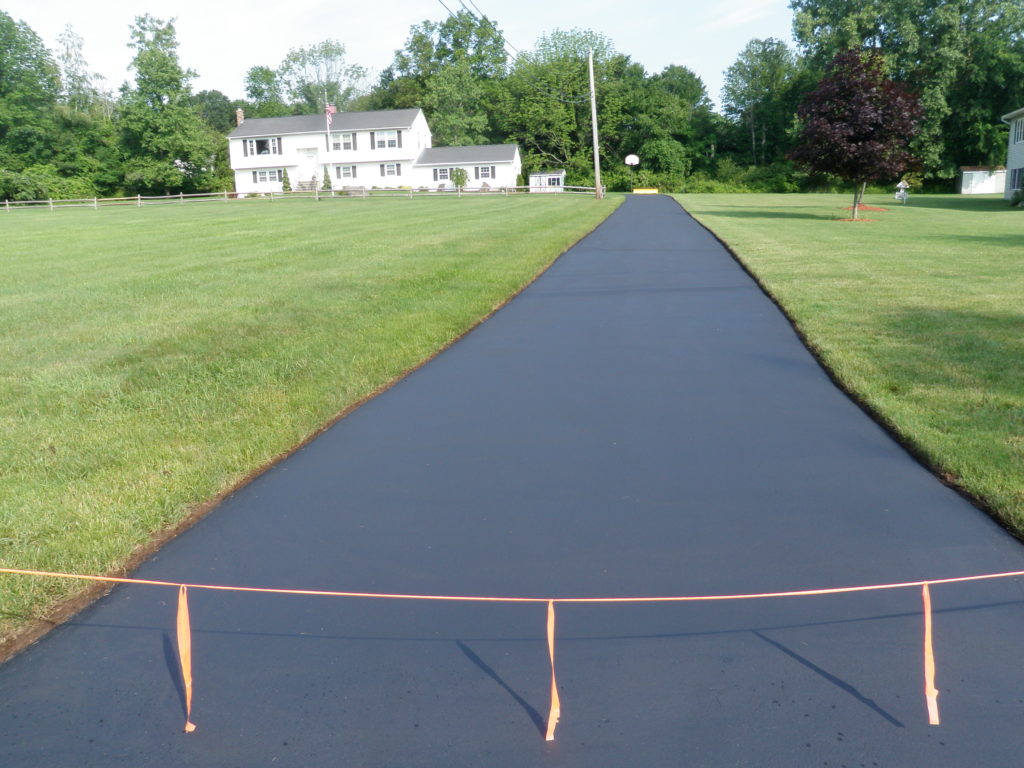
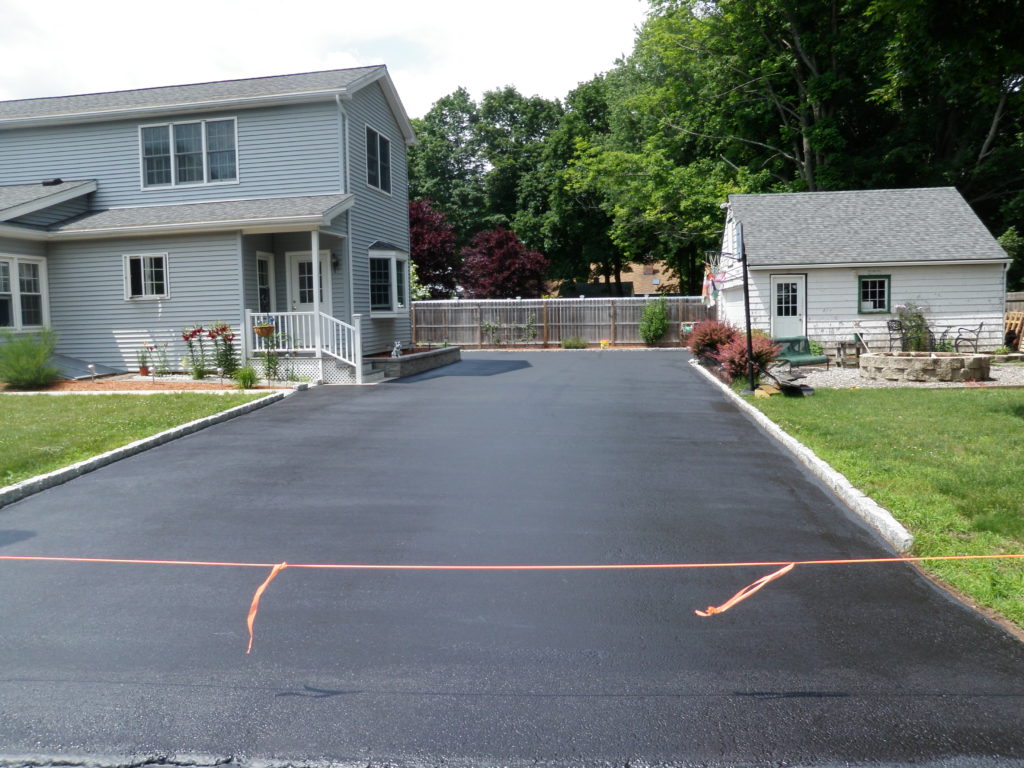
ORANGE RIBBON
After 24 hours you ar free to walk on your newly sealed driveway and after 48 you are ready to drive on it! Lastly, please leave up our sign so we can retrieve them.
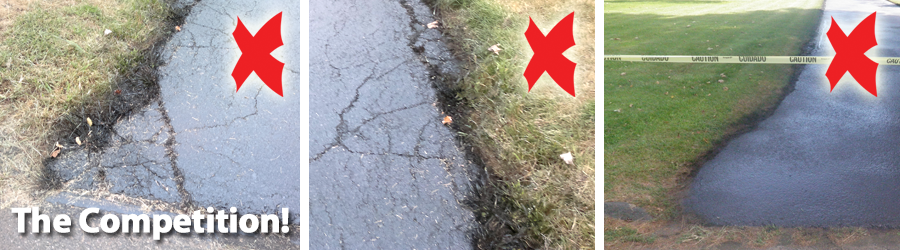
What we Don't do!
What we DO!
Be wary of sloppy discount outfits! Many companies skip edging the grass back and just quickly spray the sealer on ruining your grass and anything else nearby. We have even seen sealcoaters get overspray on fences, siding and even cars!
After pavement sealing please...
Keep automobiles off of freshly sealed pavement for 24-48 hours, depending on drying conditions.
Be careful not to walk on the driveway too soon as some areas may take longer to dry than others.
A freshly sealed pavement can be easily scuffed or scarred the first few weeks by thoughtless driving especially if it is very hot out. The churning action of front tires or sudden stops and starts can cause scuffing. If scuffing does occur it is very rarely permanent and should fade out within 1-4 weeks.
The purpose of the crack sealer is to prevent surface water penetration. The crack sealant will remain flexible so that it can expand and contract with the pavement. Minor tracking of the material may occur on very hot days in areas where application needs are particularly heavy. If tracking does occur, apply a light dusting of sand to the affected area. Due to the texture and flexibility of crack repair material or the size of certain cracks, a repair may be visible through sealer. Upon cooling of crack sealant, some settling may occur. Crack sealing is preventative maintenance; some damage may still persist.
 |
 |
 |